

See part 1 here.
Armed with my materials, tools and a plan (I can hear the A-Team theme tune in my head) I set to building my gaming board. Given that it was raining heavily outside I decided to build it in the spare room, especially as my wife was out – I should have time to build and tidy up before she got back.

My woodworking skills are rather basic. I can cut wood with a saw (but not very straight) and I can use a drill and screwdriver. I managed to build a shed over the course of the summer, so was feeling that I would take this project in my stride. However, accuracy is not my strong point, despite the best of intentions and plans – my manual skills fall a little short.
The bottom line is that once the frame was together, the foam no longer fitted inside, in spite of all my calculations. I had somehow made the frame a couple of mm too short on one side, from plan to reality. Easily solved though – I took a long metal ruler and a craft knife and carefully shaved off the required amount. The foam slotted in like a hand in a glove – perfect. Much better too big than too short – I'd hate the foam to slide around in there.

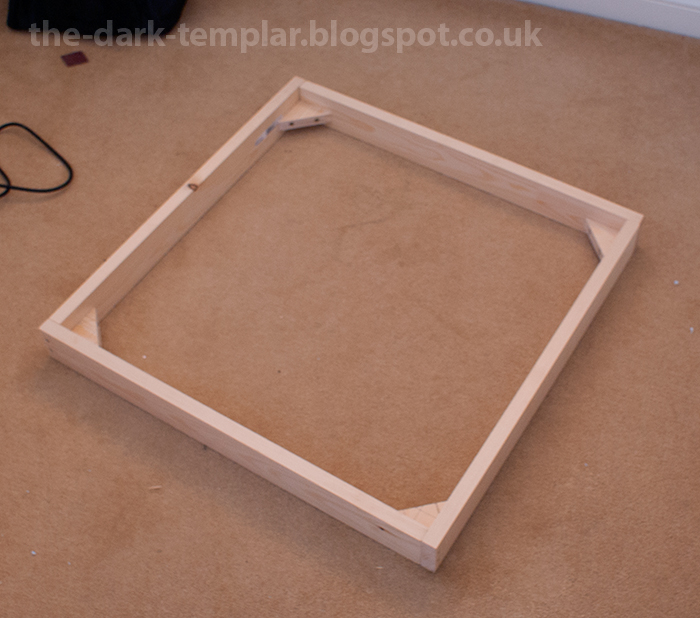
I decided to change the plan on the fly at this point. The wood I had to make the corner supports was too thin to drive a screw through I decided, so I cut more of the frame wood into triangle shapes for the corners. I marked these up to ensure my drill holes were in the right place.

I screwed them into place using a Lego brick as a temporary spacer to ensure they were all at the same height from the base. They went in surprisingly well and made the frame much more solid. I was using 40mm length screws throughout to make sure there was enough to grip the wood on either side of a join.
I made sure that the screws were sunk lower that the wood surface so that I can add filler or wood glue to hide the joins. I will probably paint the frame in a gloss paint, once everything has dried, to give it a clean look and make it more durable.

When the foam was dropped in again it now sat a good 20mm above the frame. A little more than in my original plan (due to using thicker wood in the corners) but I'm not concerned as I will be carving into the foam when I create the playing surface. This will obviously weaken the foam, given that there is a massive void underneath it, but it should be more than strong enough unless I'm using lots of large, heavy models on there. I could always drop in a square piece of hardboard underneath the foam to support it if required.
All told it took about an hour and a half from start to finish… and my wife turn up as I turned off the hoover!
Part 3…
Very robust and sturdy. The whole thing has a professional look to it.
ReplyDeleteHaha, not sure about professional but it is pretty sturdy.
Deletelooking good, cant wait till part 3
ReplyDeleteI can't wait either - that's when it gets interesting!
Deletelooks good so far. If the foams not glued in yet I'd remove the foam whilst cutting it and put it on a flat surface just in case you can always glue it in afterwards.
ReplyDeleteCheers Simon. No glue in sight here as I will be making multiple foam inserts that I can swap around. It means we can play on a host of different surfaces and environments.
DeleteIt definitely needed the corners, for stability as well as to hold up the foam.
ReplyDelete