31 December 2014

Goodbye 2014… Hello 2015


Another year flies by and this has been a year that will stick in my mind for many yet to come. From a hobby perspective this year was definitely a quiet one, but one that I think will finally see the end of my 40k aspirations.


2014 began with our unquenchable thirst for Blood Bowl. I can genuinely say that I have not been as excited by the hobby in a long time as I was for playing BB. In fact, it has to be said that Blood Bowl consumed me all the way up to Salute.

Behind the scenes I had been working on the miniatures board game Aetherium and, as the kickstarter began around the time of Salute, it was announced to the world. This was an experience I will not forget easily. Very exciting times and I wish Brian and the Anvil Eight guys all the very best.

Post Salute my attention was turned towards a secret project of my own devising, Normans vs Rangers (we will call it for now). It has been sitting in the back of my mind ever since and is currently the only light on the horizon for the painting table.


Then the summer brought us 7th Edition 40k. I will admit to being skeptical from the off and, despite purchasing the rulebook(s) was never fully convinced. We spent the summer months on a multi-game campaign to give Bull's Orks a run out and me a chance to start a new marine chapter. My Imperial Fists never really got out of the gate and I reverted to my chaos minions to fill the campaign void. We had some fun but ultimately never got to complete the final chapter.

In the meantime, Zombicide snuck in under the radar and has the potential to become something of a favourite. In a similar vein to Blood Bowl it has a certain longevity and will no doubt feature again on the blog in the coming year.


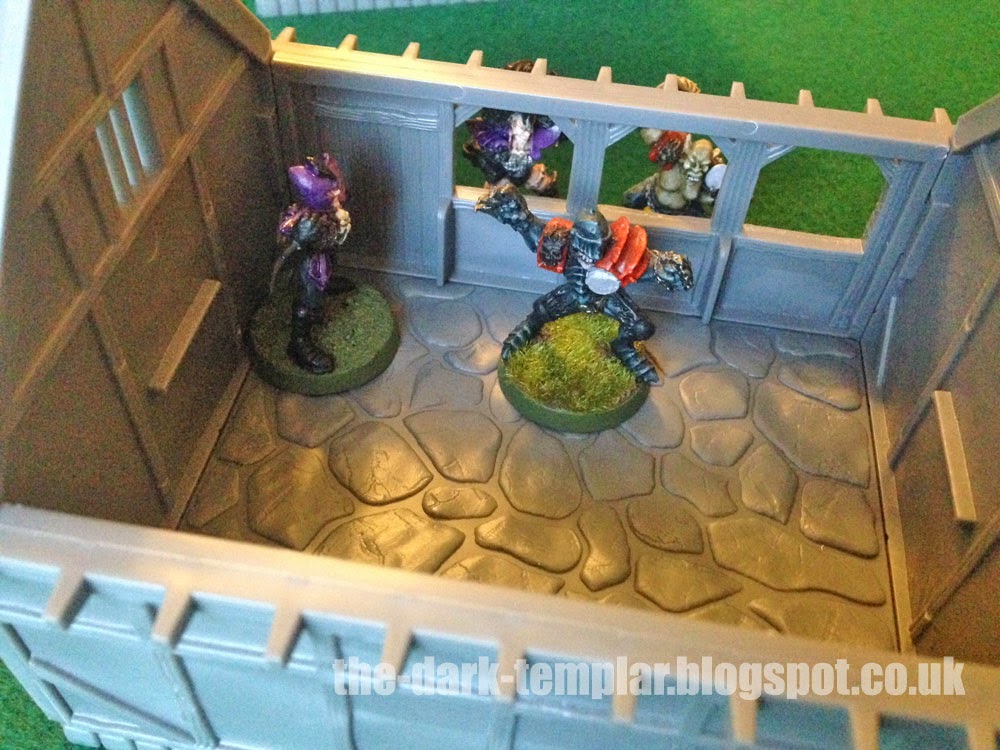
Autumn saw me get totally mugged by plastic shiny things, thanks to Tabletop Workshop. First their Monastic Scenery set arrived at the door, followed by the wonderful plastic castle… which I have yet to complete.

As a means to fill the hobby void, I spent large parts of October and November illustrating some of the basics of designing a rulebook, from the perspective of a graphic designer. I have to say I really enjoyed this, even though it only skimmed the surface, and it made a pleasant departure at a time where spare time was scarce.

That's pretty much where the hobby year ended – rather quiet by previous years. But little was I to know how this year would truly be defined.


++++++++++


The year had already been monumental for me and my wife. We were due to move house in January, which fell through. We were also in the middle of becoming approved adoptive parents, though this too would fall through. We discovered in April that we were going to have our own baby and this was swiftly followed by moving to an even better house that we had previously missed out on. Just before moving I got a new, full time job which has been a breath of fresh air – it's been non-stop life changing events in 2014.

With our son due at the beginning of December the latter half of the year has been happy, exciting times despite hardly having five minutes to devote to hobby things, preparing for his arrival. The anticipation reached fever pitch as November rolled into December. His due date came and went and it became apparent that we would have to go into hospital to be induced – he was just too comfy in there.


What has happened in the time since I would not wish on my worst enemy. We have endured a terribly distressing time, not least when I thought I had lost both my wife and my son in the operating theatre. Yet, Finn Henry William Reynolds was born on 21st December and despite suffering severe distress and oxygen deprivation he has fought his way back from the brink and made us very proud parents. He is no longer in intensive care and could even be home with us by the weekend, which is nothing short of a miracle.

At the risk of sounding over-dramatic, I can say hand on heart that I am not the same person I was a fortnight ago. I used to think that lots of things mattered, but they don't, and this experience has given me a clear perspective for the future. We didn't have much of a Christmas this year but New Year is becoming truly special.

So with that in mind I wish you all the best for the New Year and hope that we can all make some solid resolutions for 2015, both in the hobby and life outside.


03 December 2014

World Of Twilight


You may remember a couple of weeks ago I did a design review of the World of Twilight book 3 that I received as part of their kickstarter campaign. You may also remember that I wasn't terribly happy with the finished product due to poor print finishing (not the content I hasten to add).

As part of my conversations with Mike Thorp, the man behind World of Twilight, he suggested I take a look at the WoT compilation book to compare and sent me an early copy. I have to say that my reaction when I opened the parcel this time was exactly what was missing first time around. This book is beautiful.


To begin with, the cover. I think this has to go down as one of my favourite rulebook covers of all time. It does not depict a great battle, or a montage of the races involved, it's simply a snapshot of Anyaral – the world in which Twilight is set. The decision to have Andreas Rocha do the front cover was genius. His illustration style is the perfect fit for WoT and you would think he'd been illustrating Anyaral for years already. As great as Mike Thorp's pencil sketches are at setting the scene this front cover truly lifts things to the next level. Having said that, less is more – restricting the full colour illustrations to the cover, leaving the pencil sketches inside was a great decision. The balance inside the book remains quite delicate and lots of full colour imagery could have overpowered things.


The book itself is A5, 152 pages, perfect bound, with a matt laminated cover – much like the smaller Malifaux rulebook – with none of the print-related flaws that I found previously. It is actually a compilation of all three WoT books thus far and, with that in mind, the layout inside matches the other books. The pages have a grungy, aged paper background with parchment-style boxes dotted about to highlight things of importance or background fluff extracts.


The pencil sketches make this book what it is and the graphic style follows suit creating the image of something truly hand-rendered. This sets it apart from every other rulebook I can think of. With its duotone colours, the book feels like it could almost be some ancient tome or journal from Anyaral, recording history and events. Even the example diagrams and blast templates are hand-rendered which completes the look perfectly.

This book has been planned and executed very well – lots of focus on the detail, without losing sight of the overall picture. Even if you have no intention of buying models (which are superb by the way) and playing the game, this book is definitely worth adding to your collection.

This is a fantastic book all round and a jolly good read too.


28 November 2014

300k Page Views


It's good fun to acknowledge little achievements like these. Whilst the high-flying hobby gurus are racking up 500k or even a million page views, my little blog continues its consistent plod, recently passing 300k page views – very exciting indeed.

Thanks to everyone who has visited the blog over the past five years, it's quite a buzz to know that people are actually reading what I have to say and even commenting. Things have slowed on the hobby front as my time is taken up with other things, but my hobby enthusiasm is overflowing in spite (or because) of this.

The coming month is going to be an odd time as our baby son is due imminently. My hope is that the blog will continue to be my hobby outlet, although I may struggle even more for genuine content during this initial 'newborn' period. Whilst surrounded by all things baby-related it will be nice to have a hobby harbour to shelter in.

But what blog stuff is on the horizon…?

On the top of the list is to continue coverage of my Castle exploits. I hope to finish building the kit and have some images of the whole thing together, with miniatures to give people an idea of scale.

It would be my ultimate goal to get my gaming board done and find a permanent home for the castle – and paint it all – but I think this will remain a long term goal for now. This may actually be a blessing as TW have hinted at their castle gatehouse release in the new year. What an addition that would be. Very exciting!

I also intend to finish my Rulebook Design series with a look at some rulebooks that I think got it right, as well as a couple of classic examples to examine.

I'm hoping to introduce some videos into the mix and expand the YouTube channel. Obviously this will require quite some input so another long-term goal.

Needless to say there's no end in sight for the blog!


26 November 2014

TW Plastic Castle – Wall Gate


So, having already looked at the Tower and Fortified Wall kits, we come to the last piece of the TW Castle puzzle – the Wall Gate. I was very much looking forward to seeing this!


The box contains four sprues of two different designs and another instruction sheet. I was very keen on not messing this one up so read the sheet carefully before I started.


The kit follows a similar theme to the Fortified Wall. The ground floor is a little different as when complete it's made up of two pieces with the doors attached.

MISTAKE #1
I did make a mistake here and stuck the end pieces (that the doors clip into) the wrong way around. It's not very clear on the sheet which way round these go but if you remember that the doors go at the flared wall side (rather than the flat inner wall side) you will be fine.

You may find TW's Wall Gate video of help.


The first floor is not dissimilar to the wall – except you have an arch piece that goes in the middle. All pretty straightforward it has to be said. The top of the Wall Gate is identical to the Wall crenulated piece so you've got no excuses for getting that wrong.


When stacked together they look pretty amazing. The one thing to note is that the ground floor (as it's made up of two pieces) was rather loose, so the gate will only be at its best when part of a combined kit. You can't really game on the interior as there isn't enough space, but it's not missed.


The models look very cool when next to the completed kit, and I cannot wait for TW to complete their gatehouse kit.


Both this kit and the Wall kit have connector pieces that allow you to slide walls/gates together, and I couldn't help but give them a try before I packed up for the evening.

The only thing left is to put the whole castle together…!!

To be continued…


24 November 2014

TW Plastic Castle – Fortified Wall


For those of you who missed my fun and games with the TW Tower you need to watch the Tabletop Workshop castle videos before you get started and it will save a lot of the issues I had. I didn't watch them in my haste to get stuck in and promptly had all kinds of mishaps. Not a problem though as I will use my first Tower model separately from the castle as an independent watchtower of some kind.


Unlike the Tower kit, the Fortified Wall is unlikely to ever be used on its own.


Opening the box there are four sprues of two different designs – there are also instructions!


Starting with the ground floor, you stick the arches onto the base, followed by the one-piece inner wall.


The outer wall is made up of four pieces of 'flared' wall and checking the illustration on the instructions will ensure you put the right piece in the right place. That was easy.

The first floor is even easier as it's exactly the same procedure except both walls are single piece – the outside wall has windows in it.


The top of the wall is a simple case of sticking crenulations onto a floor piece then adding some pegs underneath. That is it!

The only thing to note is that you will have to shave/file off any excess where the parts were attached to the sprues. If you don't the pieces may not join up snugly.


Once stacked, the joins are virtually invisible.


Your models have plenty of room to fight across the battlements.


The bonus is that the walls are as detailed inside as they are out. If you don't glue your floors together you can lift them off and take the battle indoors (although the model bases I've used won't fit through the doorways).

Another fantastic piece of kit from TW. Only one more element of the castle to go – The Gate – and then I hope to have some images of the kits together.


To be continued…


21 November 2014

TW Plastic Castle – Tower


After storing the rather large parcel in the garage for a couple of days, I managed to find a spare hour last night so thought I would dive in and start building my plastic castle by Tabletop Workshop.

Given that their other buildings were so intuitive to put together, how much more difficult could the castle be?

The castle consists of 4 Towers, 3 Walls, a Wall Gate and connectors for the whole lot. I decided to start with one of the Towers…


It all looked very straightforward and upon opening the box I found six sprues of two different types. It's a very cleverly designed kit and, just like the other buildings, TW have managed to keep things very streamlined and production costs low by repeating elements.

The instructions (on the back of the box) suggested that I start with the base so I duly obliged.

Unlike the instructions on the previous building kits, the one for the Tower was more like an exploded diagram, so after a quick look I figured I had the measure of it… err, not really.


The three pieces that make up the starting point were found and stuck together. "This is easy" I thought, but my lack of preparation would bite me in the backside before I was done.


MISTAKE #1
What was not obvious (to me) in my rush to get started was that the three wall sections that appear on all six Tower sprues are slightly different. The one to the right of the image (above) flares out slightly at the bottom and (I was to find out) has different fixings underneath. I began clipping and sticking random wall sections to my base before I realised my mistake.


What I should have done was clip out all the flared sections and use them on my base, as above. Not a problem. With the base piece done I moved onto the first floor.


MISTAKE #2
Again, I began sticking random wall sections, this time to my first floor before realising that, unless I want several window sections on my second floor, there should be three window and three blank walls to each floor. In the photo above you can see I'd stuck two blank wall section next to each other, leaving me with an abundance of windows.

Not a problem. This was fixed and with the experienced gained my (identical) second floor was completed in minutes.


Next came the top of the tower. Being very cautious I managed to get this right first time. You start off by sticking the three outer and three inner wall sections to your floor.


Then you stick the top of the crenulations (again, three pieces) in place to seal it all in. Job done. I would suggest having the joints in the top at a different place from the joints in the walls.


With all my sticking done I had my four floors ready to go. A simple stacking job was required and voila…a tower in an hour. There is a door and step that can be added to the ground floor, but I left things plain for now.


Let's not mess around here – this kit is simply awesome. It doesn't have the detailed elements that, say, the chapel has – but that's good. It's a blank canvas for you to tailor to suit you. All the important bits (like the brickwork) are very detailed, but it's not cluttered with random stuff… books on the floor or drapes on the walls, that you'd have to cut out if you didn't want them. If you do want them, you can add them yourself later.

I'm very excited to move onto to other elements. It'll be great to see the castle slowly come to life.


The models look great in the top of the tower and because I didn't glue the floors together, I can remove floors and have models take their adventures inside.


MISTAKE #3
This morning I realised that I had made a third mistake. The building method above is all good, but only if you intend to build your model as an independent tower.

I, however, wanted mine to be a part of my castle and in my excitement had completely forgotten above the connector sprue (above) which was in a separate bag in the large parcel. Though there are no instructions for how to use these (that I can see) it looks like they replace wall sections on the three lower floors so that they can clip into the (as yet unbuilt) wall and gate sections – notice the bottom piece on the sprue is flared.

This is going to mean either purchasing another tower kit to do properly, or hack up my lovely tower to replace wall sections. Neither option particularly appealing.

Learn from my mistakes…plan your build before you start!


19 November 2014

A Rather Large Parcel…


A rather large parcel arrived at work today. Anyone who's been following my exploits with the Tabletop Workshop plastic buildings will guess what it is!


Not sure when I'm going to get to look at this in any detail, let alone build it, but I'm a very excited geek right now. Aside from buying entire armies, this has got to be one of the biggest parcels to grace the doorstep.

Watch this space…


13 October 2014

Nurgle Price Nonsense…


I had heard rumours for a few weeks now about a whole set of Nurgle releases as part of the Warhammer "End Times".

Plastic Nurgle models – how perfect!

Always on the lookout for new additions to either the 40k Death Guard or Blood Bowl Nurgle team, when I finally got to see the above photo of the Scions of the Last Plague I thought wayhay, fantastic!!

Then I saw the price tag…

I'm sorry but I find £83 for 11 plastic models extortionate in the extreme. The models are nice but not £83 worth of nice. I appreciate that they're Ogre sized too but even so, the Ogre battalion box set contains 16 models for £65, the extra £20 cannot be justified to me.

So, I'll save my money, thank you very much, and put it towards a plastic castle instead ;)


10 October 2014

Plastic Scenery Review - part 3


So here we are with my final look at Tabletop Workshop's Monastic Scenery set. You can find part one here – Chapel – and part two here – Cottage, Barn and Stable.


Today I have photos of GW miniatures alongside the buildings, to give you lovely folks an idea of how they compare in scale. As you can see from the images, there's not a lot in it – certainly nothing to cause concern or that looks just silly.

Externally, I think the fact that the base of the building is a similar depth to the miniatures base helps the scale difference. The doors are a little on the skinny side, but not a lot. It's all looking shiny from this side!


On the inside of the chapel, it all looks good. The height of the door means that models would theoretically have to lower their heads to pass through, but it doesn't look out of place.


Similarly, the stable door is looking on the small side now that the miniature base goes against the scale difference, but not enough to cause concern. The window height of the stalls is pretty perfect.

I have to say that the difference is rather negligible – certainly a lot less than I thought it would be. I didn't have any other miniature ranges to compare but I think you can get an idea from these GW models.


The other query I had was the possibility of removing doors so that they could be opened/closed rather than a static part of the wall section. Looking at these close-up images of the stable door I have to say that I think it's a 50:50 project. I think for both this and the chapel, it would be possible to remove the door section, though you would destroy the door in the process.


In the case of the stable, I think removing the door would compromise the strength of the wall section as the door frame is quite thin. This could be negated somewhat by ensuring the wall section was glued permanently in place.


The wall sections are quite thick, so it will take some effort to remove the door if that's the goal.

I also have to point out that I said in the last review that the walls were very smooth. I have since noticed that there is texture on these wall sections, albeit subtle (you can just make it out on some of the stable images above). It is enough for a colour wash to pick up on though, so you would get tone variation in these sections.

Let's get down to 'brass tacks' here…

These kits are bloody awesome, even more so when bought in bundles as you get massive savings. If you're looking for an alternative (or significant improvement) to MDF or resin for your scenery you will not get better than this – the only thing better is bespoke-made terrain which takes hours and/or costs a fortune. The only thing comparable to this is the GW plastic terrain, which whilst excellent is extortionate in price and drowning in skulls. This stuff has turned my head and I'm very excited to see what Tabletop Workshop capable of in the future.

Stop faffing and go buy some already…you know you want to!!


08 October 2014

Plastic Scenery Review - part 2


I'm currently reviewing Tabletop Workshop's Monastic Scenery set, which I got hold of at the weekend. You can read part 1 here, which includes the rather lovely chapel piece.


Next on the list is the Medieval Cottage. It follows a similar style to the chapel – the pieces are loose in the box and the instructions are printed on the inside of the lid. There are six pieces that fit together exactly the same way that the chapel does.


It took a similar 10 seconds to build the cottage and the scale is perfect for my 28mm models.


Inside is nicely detailed, though I'm not sure my villagers could afford stone flooring (all these kits use the same floor piece). The side walls are quite low compared to the chapel, which makes access much easier without the need to remove a wall.


As you know I already own a 4Ground cottage, so was interested to see how they compare. As you can see there's not a lot in it. The 4Ground cottage is a little taller (the side walls certainly are) and the door opens. The TW plastic has more detail across the board but I much prefer the 'teddy fur' roof to the plastic one, which looks a bit too 'soft' and plastic and not as real. I may buy some fur and stick it over the plastic to try and match the 4Ground style. The walls in between the batons of the TW cottage are very smooth – too smooth – so I will have to employ my liquid greenstuff technique again to add some texture.

Having said all that the TW cottage is still a fantastic kit and well worth a look.


The Stable kit uses many of the same pieces as the Cottage – in fact only the walls are different. It's a clever idea to save on production costs but does mean that your buildings are the same size, which is a bit of a shame.


The new wall pieces are very detailed, as I'm learning to expect from TW, with tools leaning up agains the batons. One side is quite open which gives some great cinematic opportunities with archers.


Scale is obviously identical to the other pieces and again it's a lovely bit of kit.


The Barn kit is virtually identical to the Stable, with only a single wall different.


The same tools lean against the wall as in the Stable, but this time we have a double door front. This kit more than any other could have done with opening doors. I'm not sure how much of an extra expense it would have been, but it did feel like a bit of a missed opportunity. 


Also, the Barn being the same size as the Cottage didn't feel quite right. However, TW have managed to squeeze three building out of fundamentally the same kit so that is a major bonus.


Together, as a whole, the Monastic set sits together very well. Once painted and a bit of scenery added it will look rather stunning rather quickly. The set of four buildings came in at £50 with free P&P – that's just £12.50 each!

They all snap together very easily and have plenty of detail to make painting a breeze and a joy. As you can see my Citadel trees sit comfortably alongside them as do the 4Ground buildings so it's a win on every front.


The one thing that's got me frothing now is… if this is how good the small buildings are, how stunning is the castle going to be?!!

Next post I'll try and get some photos of the buildings next to slightly different scale models – GW Fantasy, Reaper, Darksword, etc.